
The Login Page
Brand the login page with a brand color or branded background image.
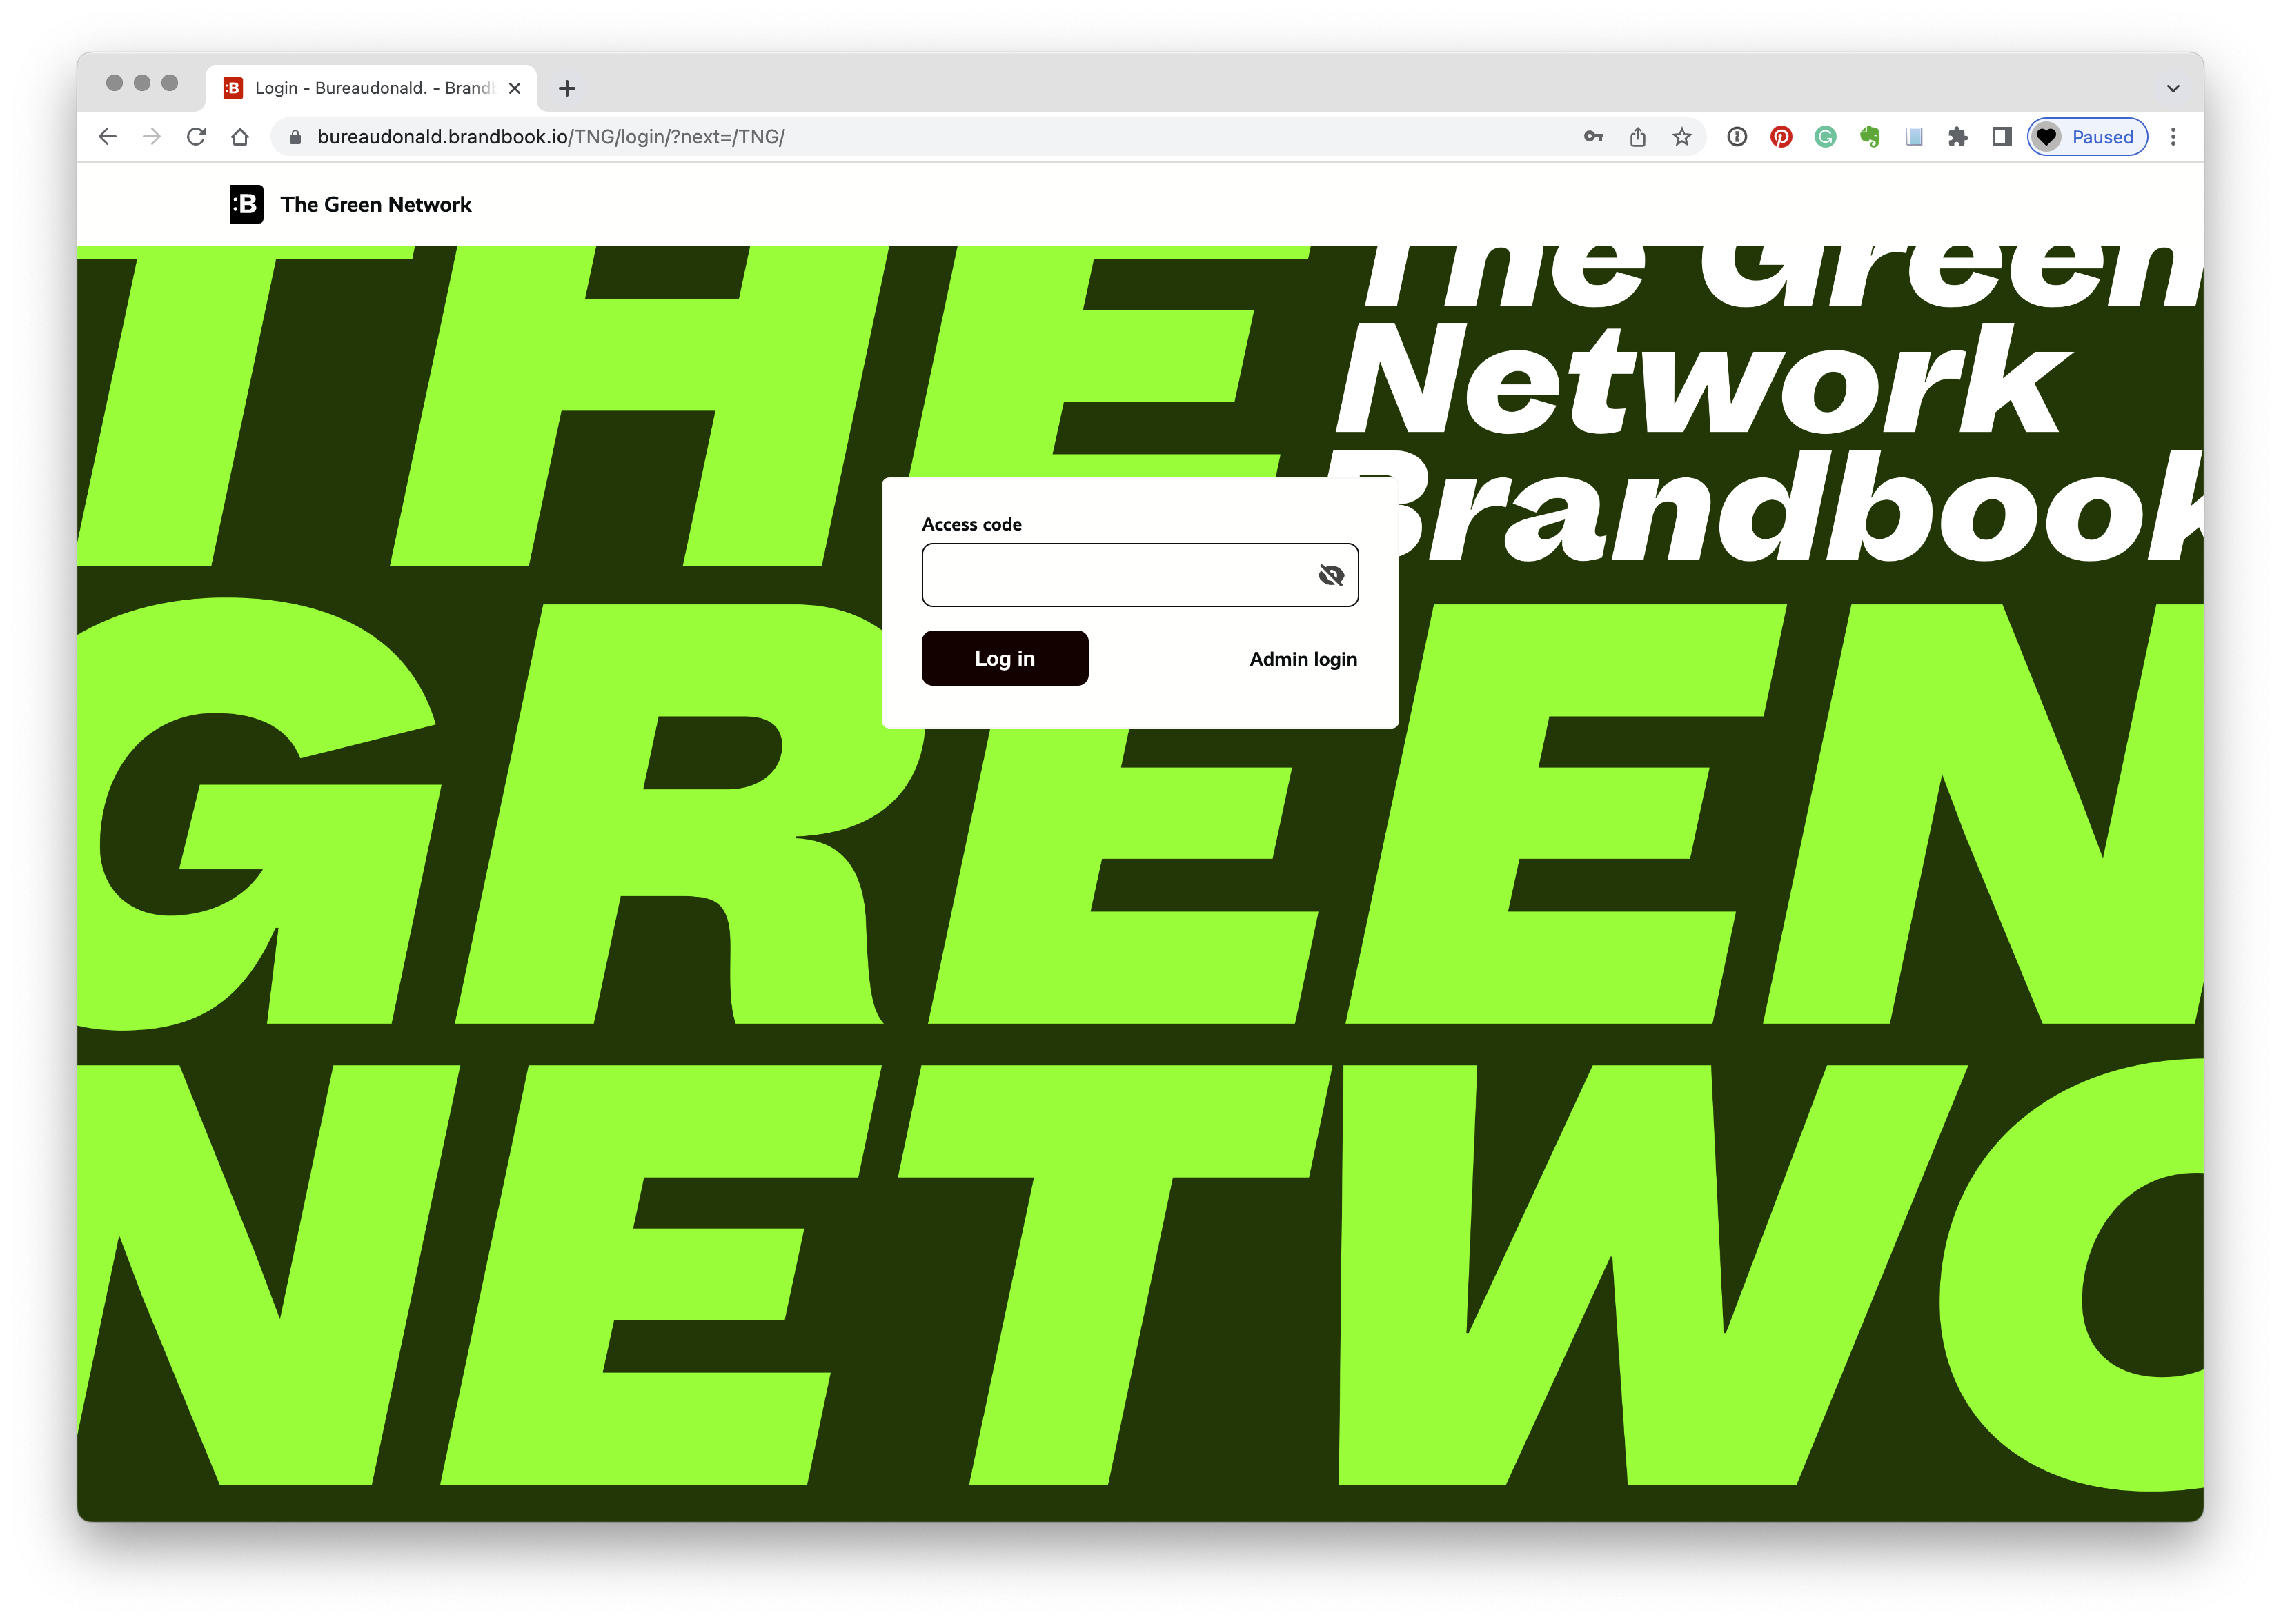
Example of a branded login page.
Set up a background image
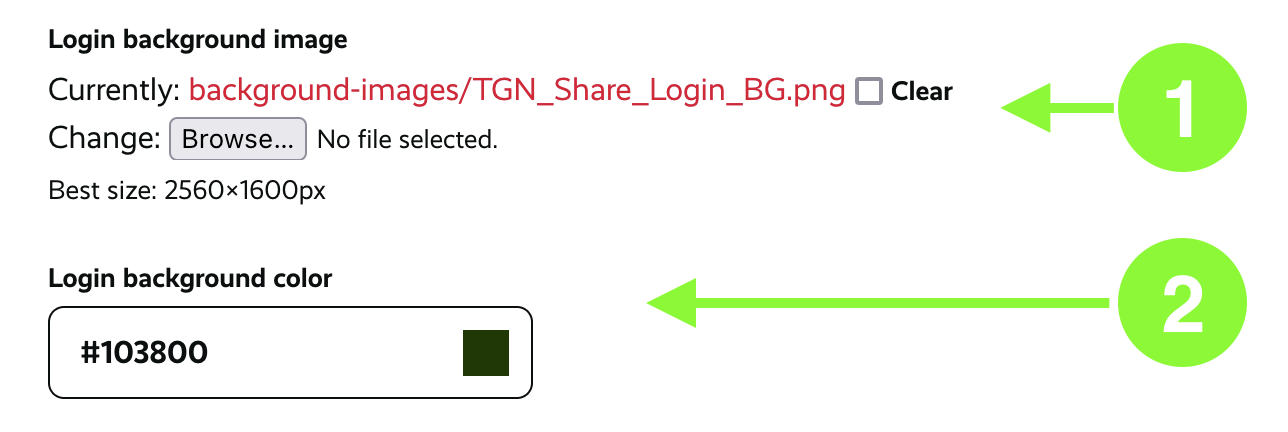
Go to “Edit” > “Settings” > “Login Page”
Scroll down. You will see these options
- You can upload a background image here
- You can set a background color as fall back or instead of a background image
Add an intro message
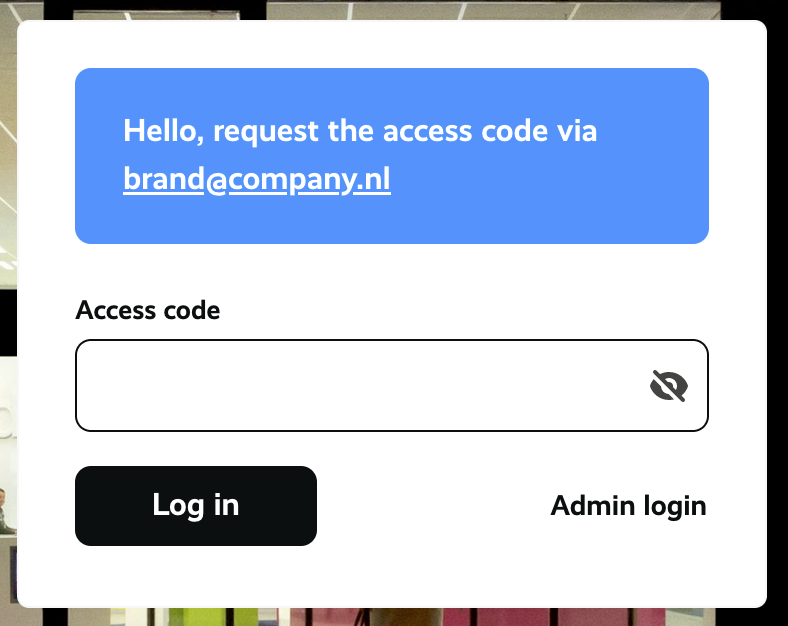
Admins can put up a short message. For instance, to let users know where to request the access code.
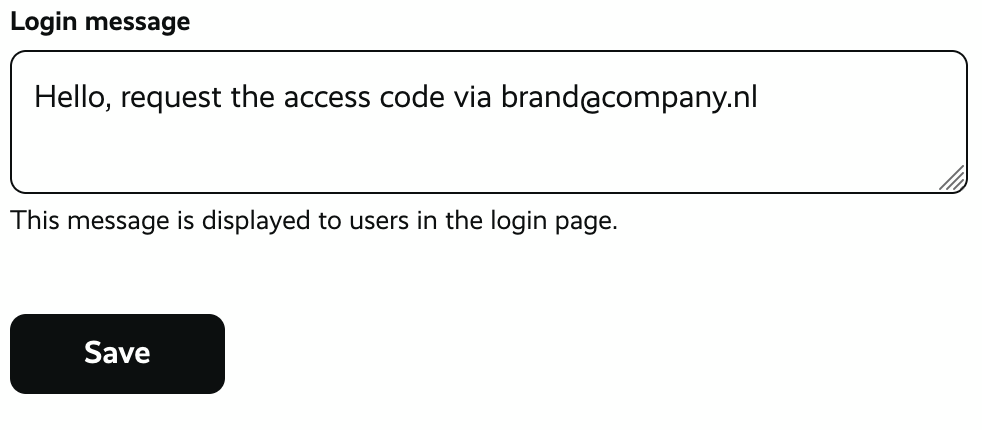
Go to “Edit” > “Settings” > “Login Page”
You can add your message in the text field Login Message
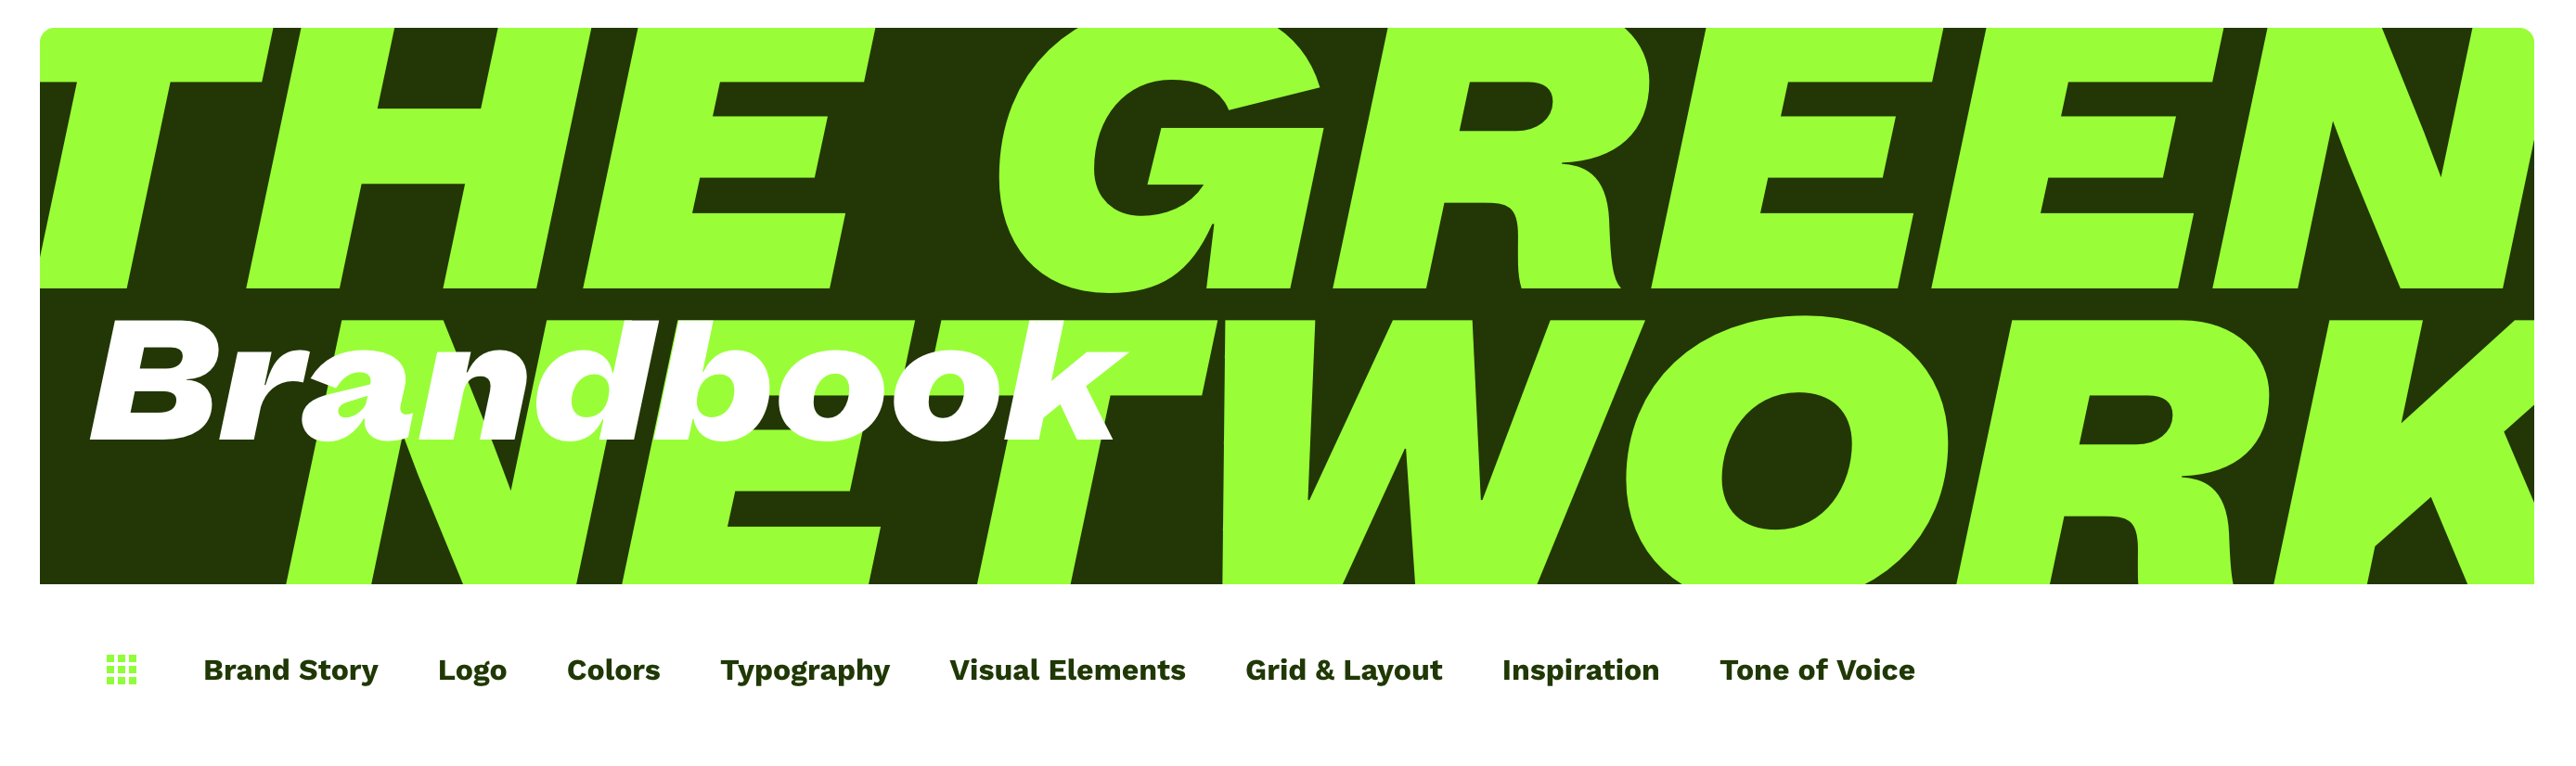
Header Images
You can set a main header image, which will be visible on every page. Per page you can override the main header image with a dedicated header image.

Set the Main Header Image
Go to “Edit” > “Settings” > “Brandbook”
You can upload the header image here
Override the Header Image
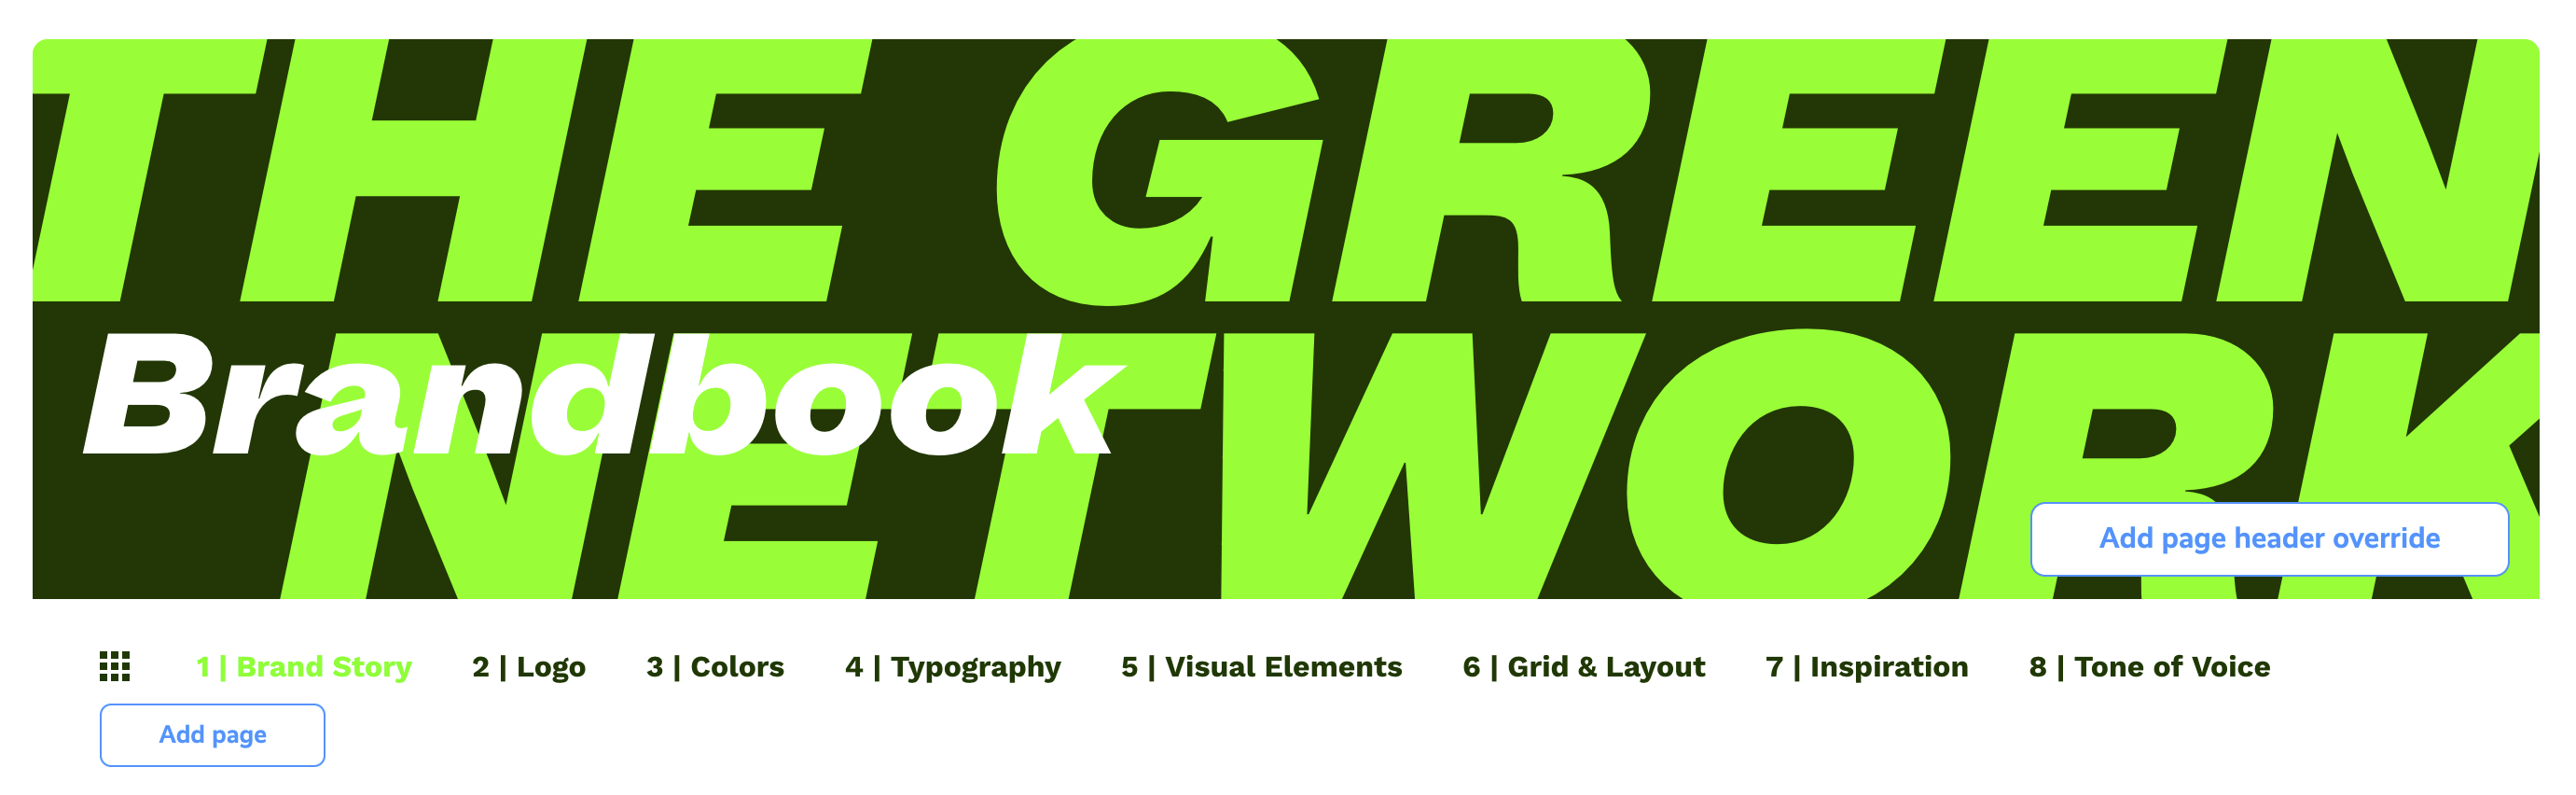
Override the Header Image
Go to “Edit” and select the page where you would like to override the header image.
In the bottom-left corner, there is a button “Add page header override”.
Click the button, now you can upload a header image specific to this page

Override of the the header image for Brand Story
Table of Contents
Default the first page the user will see after the login page is the overview page or the Table of Contents.
This page is generated by Brandbook and contains the links to the sections of the different pages.
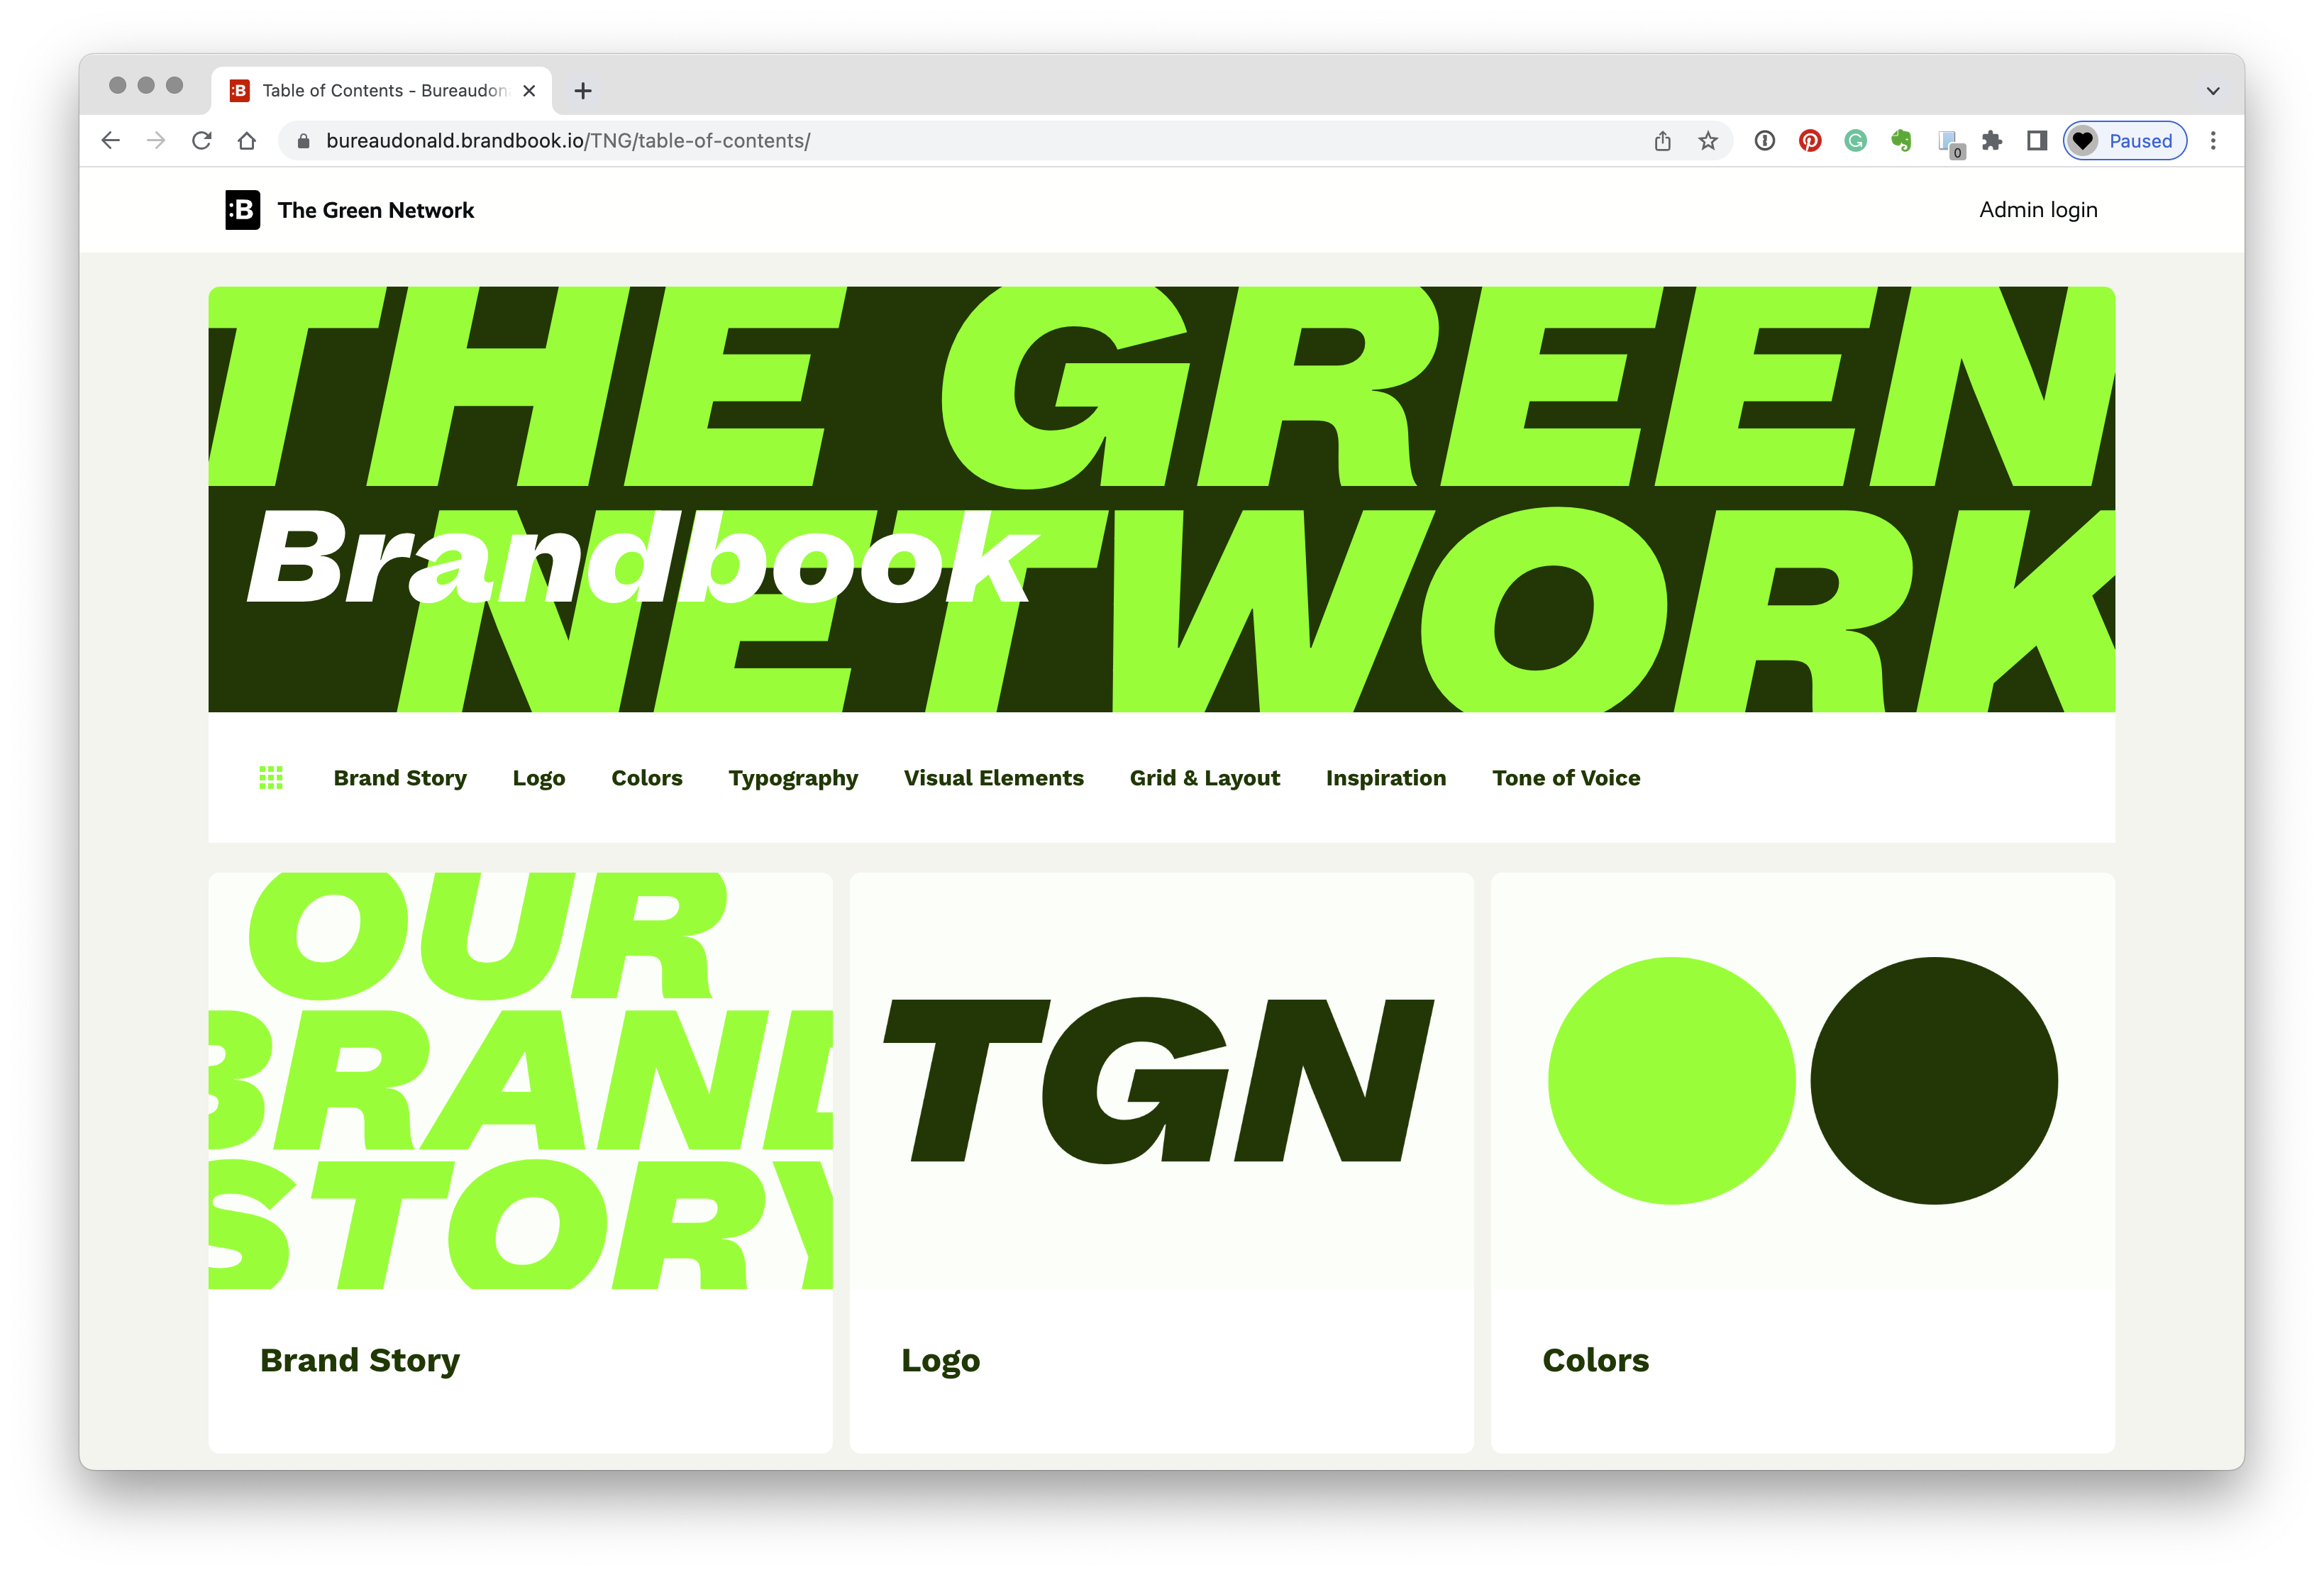
Add/Change the ToC Thumbs
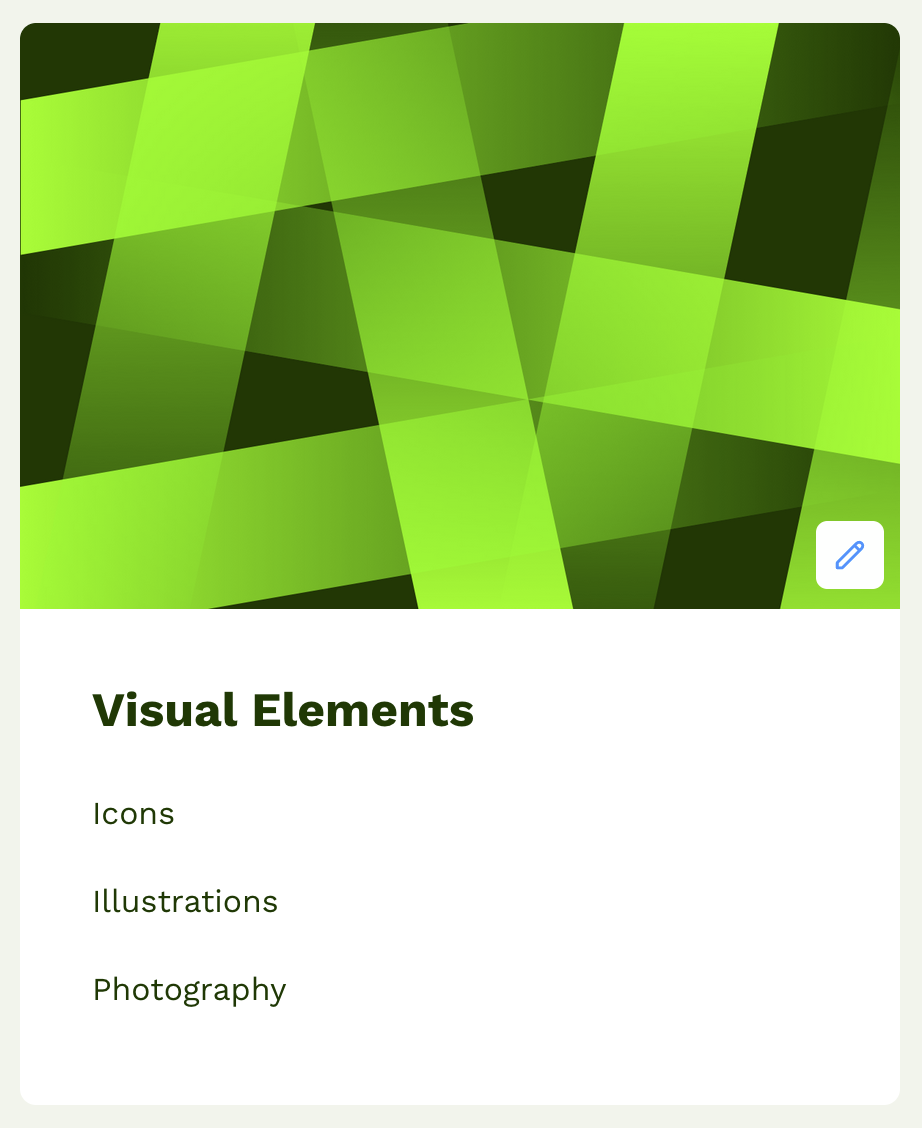
Go to “Edit” on the Table of Contents page you will see an edit icon in the bottom-left corner. Click this button to add or change the thumb.
Table of Contents Settings
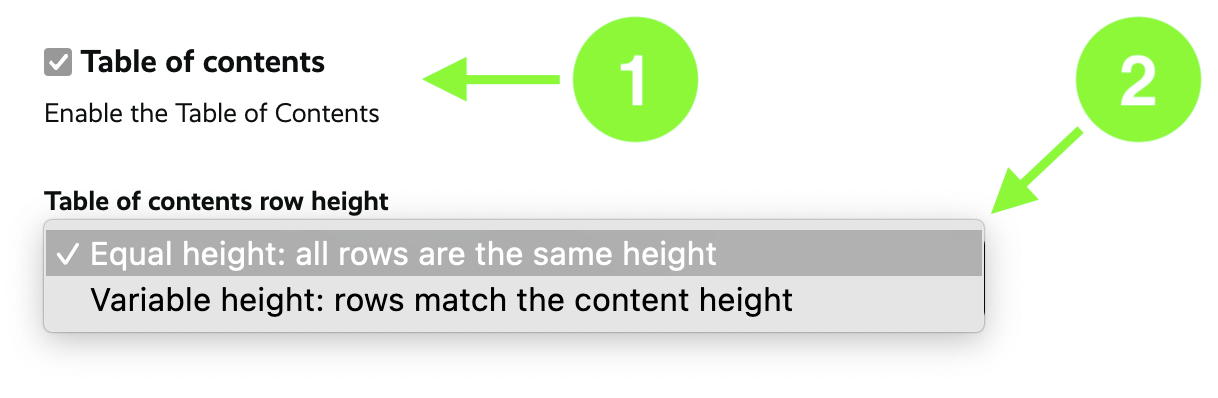
You can change the settings of the Table of Contents.
Go to “Edit” > “Settings” > “Brandbook”
Scroll down you will find these textfields.
- When the checkbox is active, the first page of the Brandbook will display a Table of Contents
- You can select if all the rows have the same height or differ per row
Theme
You can theme your Brandbook easily by adding the brand colors and add any Google Font you like.

You can theme your Brandbook
Go to “Edit” > “Settings” > “Theme”
- Define the Colors, you can use the brand colors
- Add a Google Font. Add the specimen URL for the Google Font in the text field e.g. https://fonts.google.com/specimen/Roboto Brandbook will find the different styles by itself
Logo, Favicon, Open Graph
Main Nav Logo
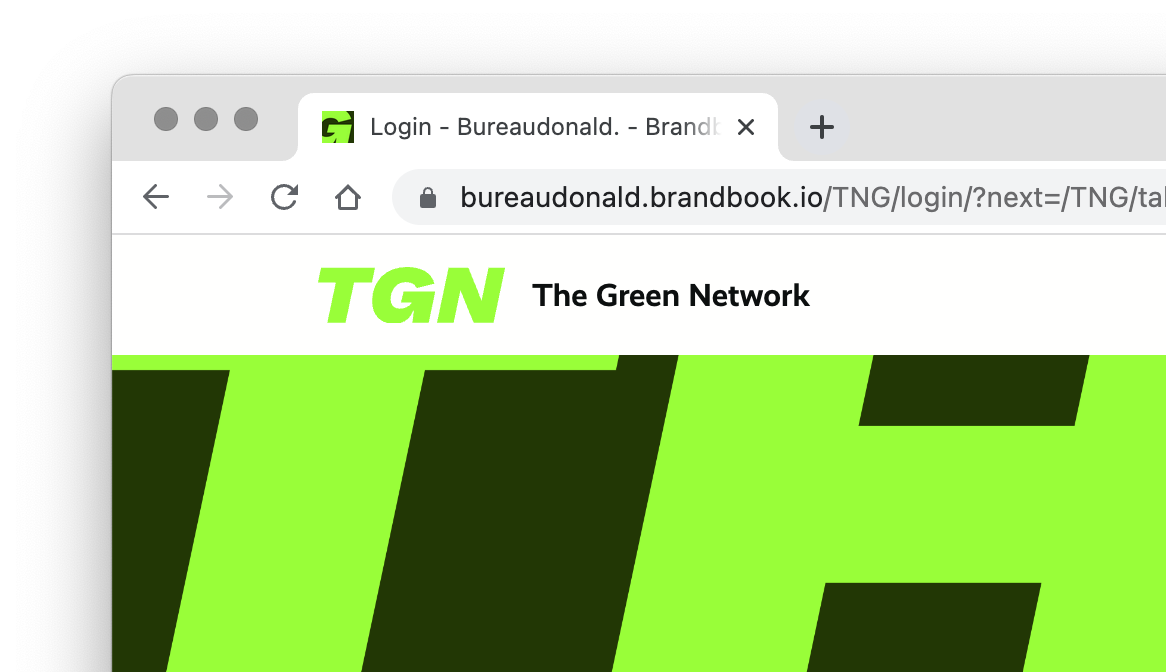
You can change the main nav logo and the URL. Default this is the Brandbook B.

This is the Main nav logo
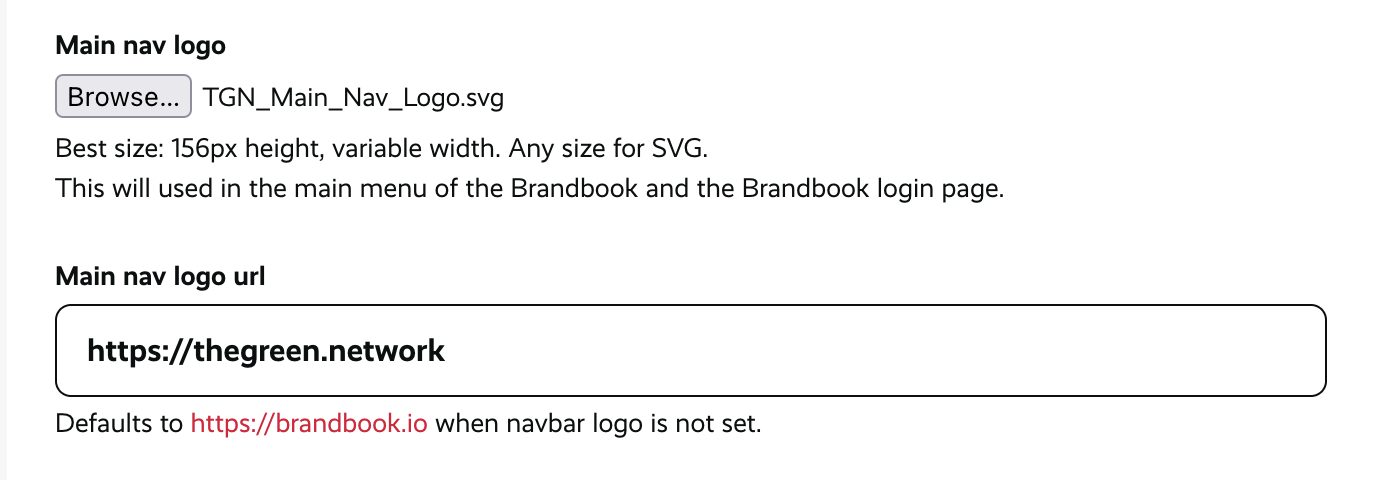
Upload your Main nav Logo
Go to “Edit” > “Settings” > “Brandbook”
Scroll half way, you will find the Main nav logo section.
You can upload your logo and overwrite the URL to you own website.

The default Main nav logo, replaced by your own logo and URL.
Favicon
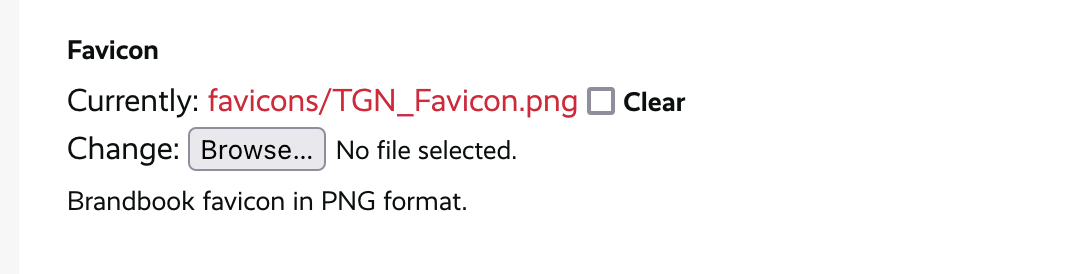
Replace the default Brandbook Favicon
Go to “Edit” > “Settings” > “Brandbook”
Scroll half way, you will find the favicon upload field.
Upload your favicon here.
Open Graph
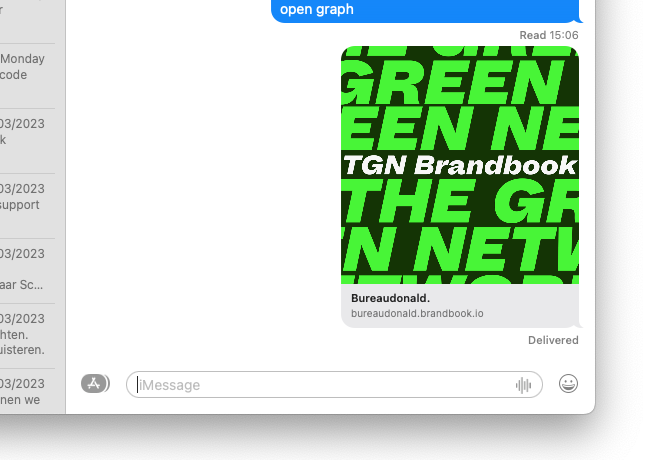
Open Graph image
When sharing the Brandbook in the mail or chat this will be the image that the receiver will see.
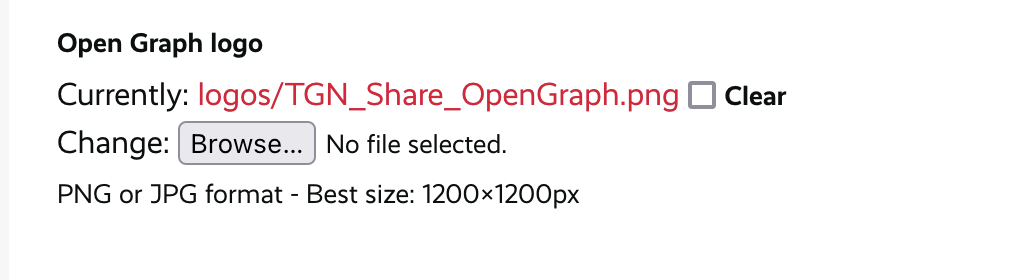
Set an Open Graph image
Go to “Edit” > “Settings” > “Sharing”
Scroll down the page and you will find the option to upload you Open Graph image.