
Go to Settings
Edit > Settings

As admin click “Edit”, brandbook will go in Edit modus. The top bar will turn blue.

Now click “Settings”
Tab: Brandbook
Brandbook Name and URL
Brandbook Name and URL
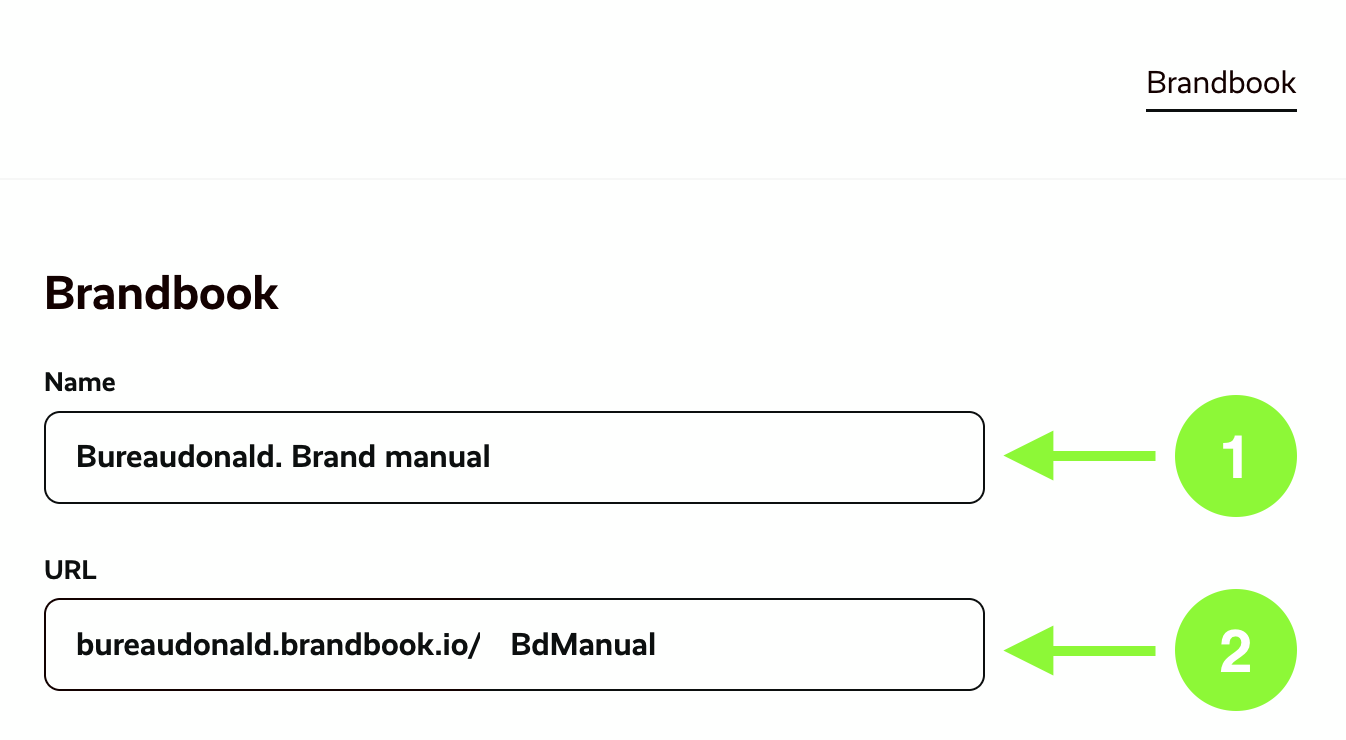
Under the tab Brandbook you can set up the main topics of the organization’s Brandbook.
- Name: You can add/change the name of the Brandbook here. This will also change the name of the Brandbook in the top left corner on the front side.
- You can change the sub URL. This is useful when the organization has multiple Brandbooks. When there is only one Brandbook the user will be redirected automatically to the organization’s Brandbook.
To change the subdomain please contact us support@brandbook.io

You can change the title of the Brandbook under Settings > Brandbook > Name
Organization Branding
Organization Branding
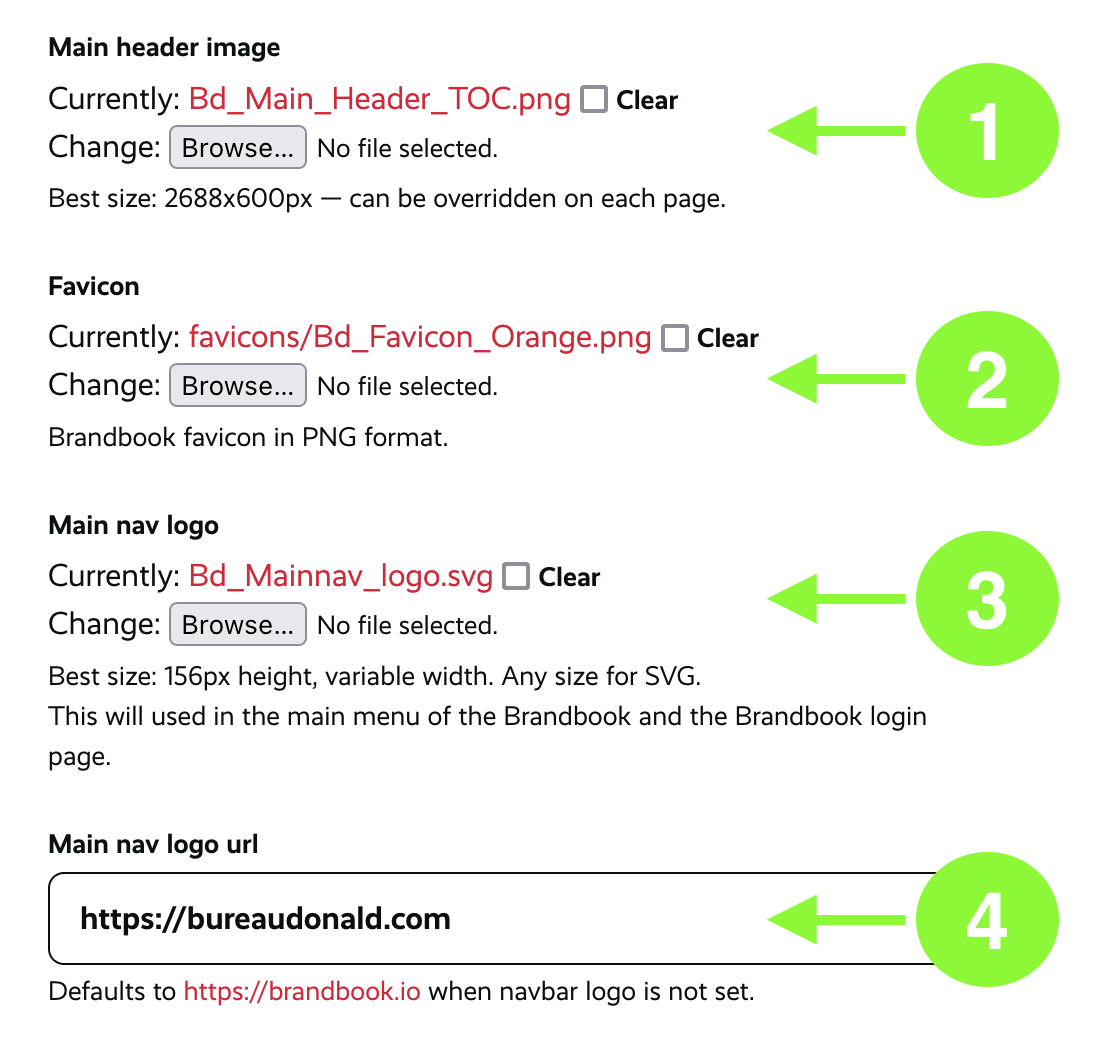
- Upload here the Header Image. You can override the Header Image per Page
- Upload a favicon. This will override the default Brandbook icon
- Upload a main nav logo. This will override the default Brandboo icon in the top left on everypage
- Define a URL, this will override the default URL. You can add here the URL to the organization
You can replace this logo with your own under Main nav logo and change the URL.
Table of Contents
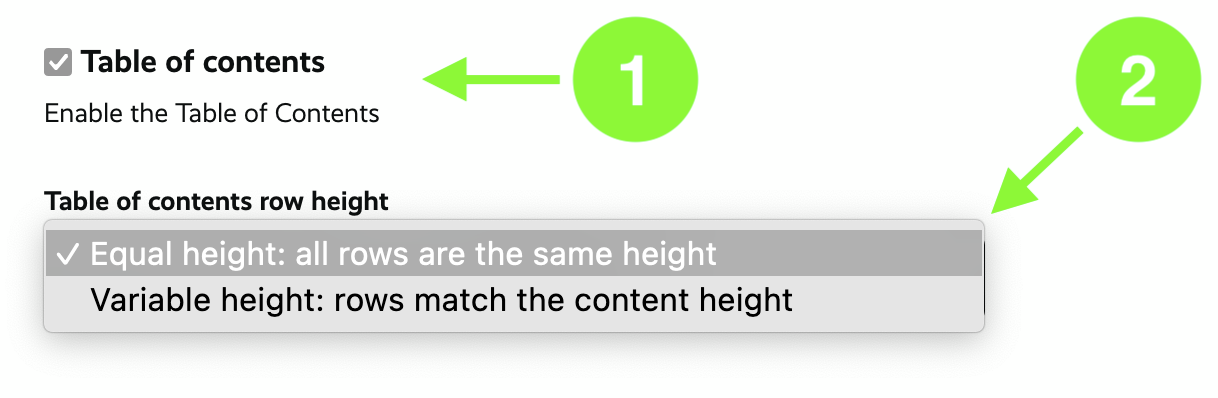
Table of Contents
- When the checkbox is active, the first page of the Brandbook will display a Table of Contents
- You can select if all the rows have the same height or differ per row
Tab: Sharing
You can share the organization’s Brandbook sharing the Access Code. Every Brandbook has one Access Code.
This section explains how to define the access code to a third party, so they can access the Brandbook. Invitees can read and download, but not edit the Brandbook. Read more about sharing your Brandbook on this page.
Access Code
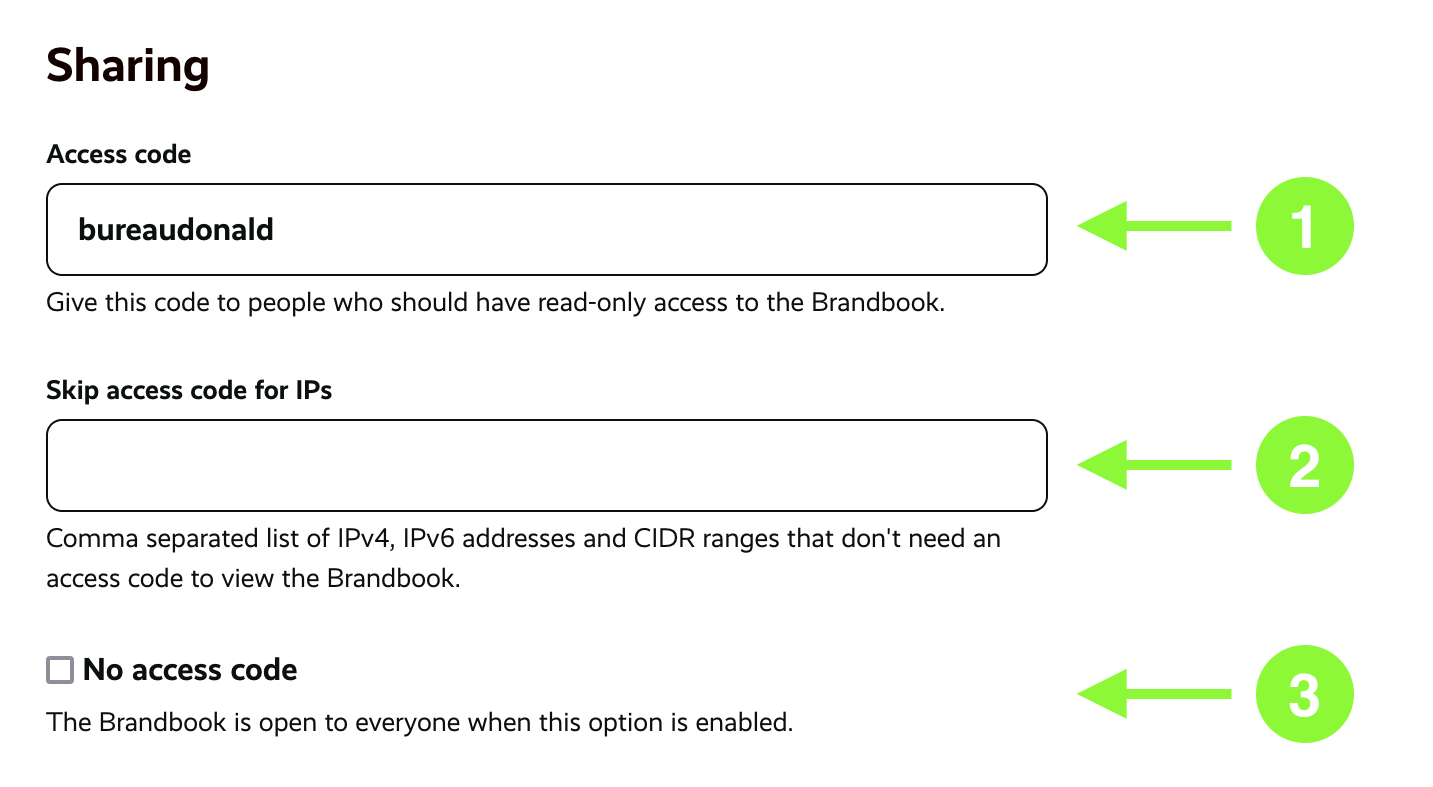
- Define the Access Code
- You can add IP addresses here. When a users enters the Brandbook via these IP addresses they will skip the login page.
- When these checkbox is active the organizations Brandbook will be accessible without Access Code. Notice everybody with the URL can enter.
Theme the Login Page
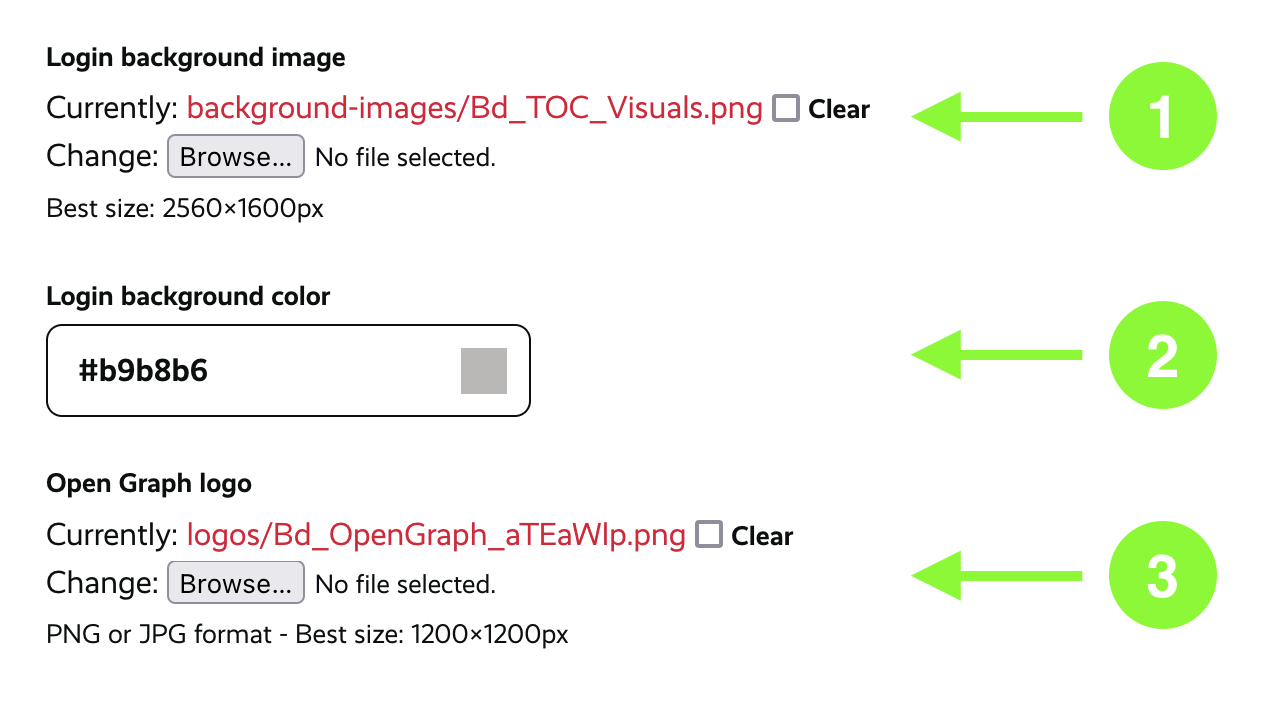
You can theme the Login Page.
- Upload a branded Background image
- Instead of an image, you can also define a background color
- You can upload an Open Graph, this is the image users will see as a preview when you share the Brandbook in a chat or email.
Tab: Theme
Theme your Brandbook
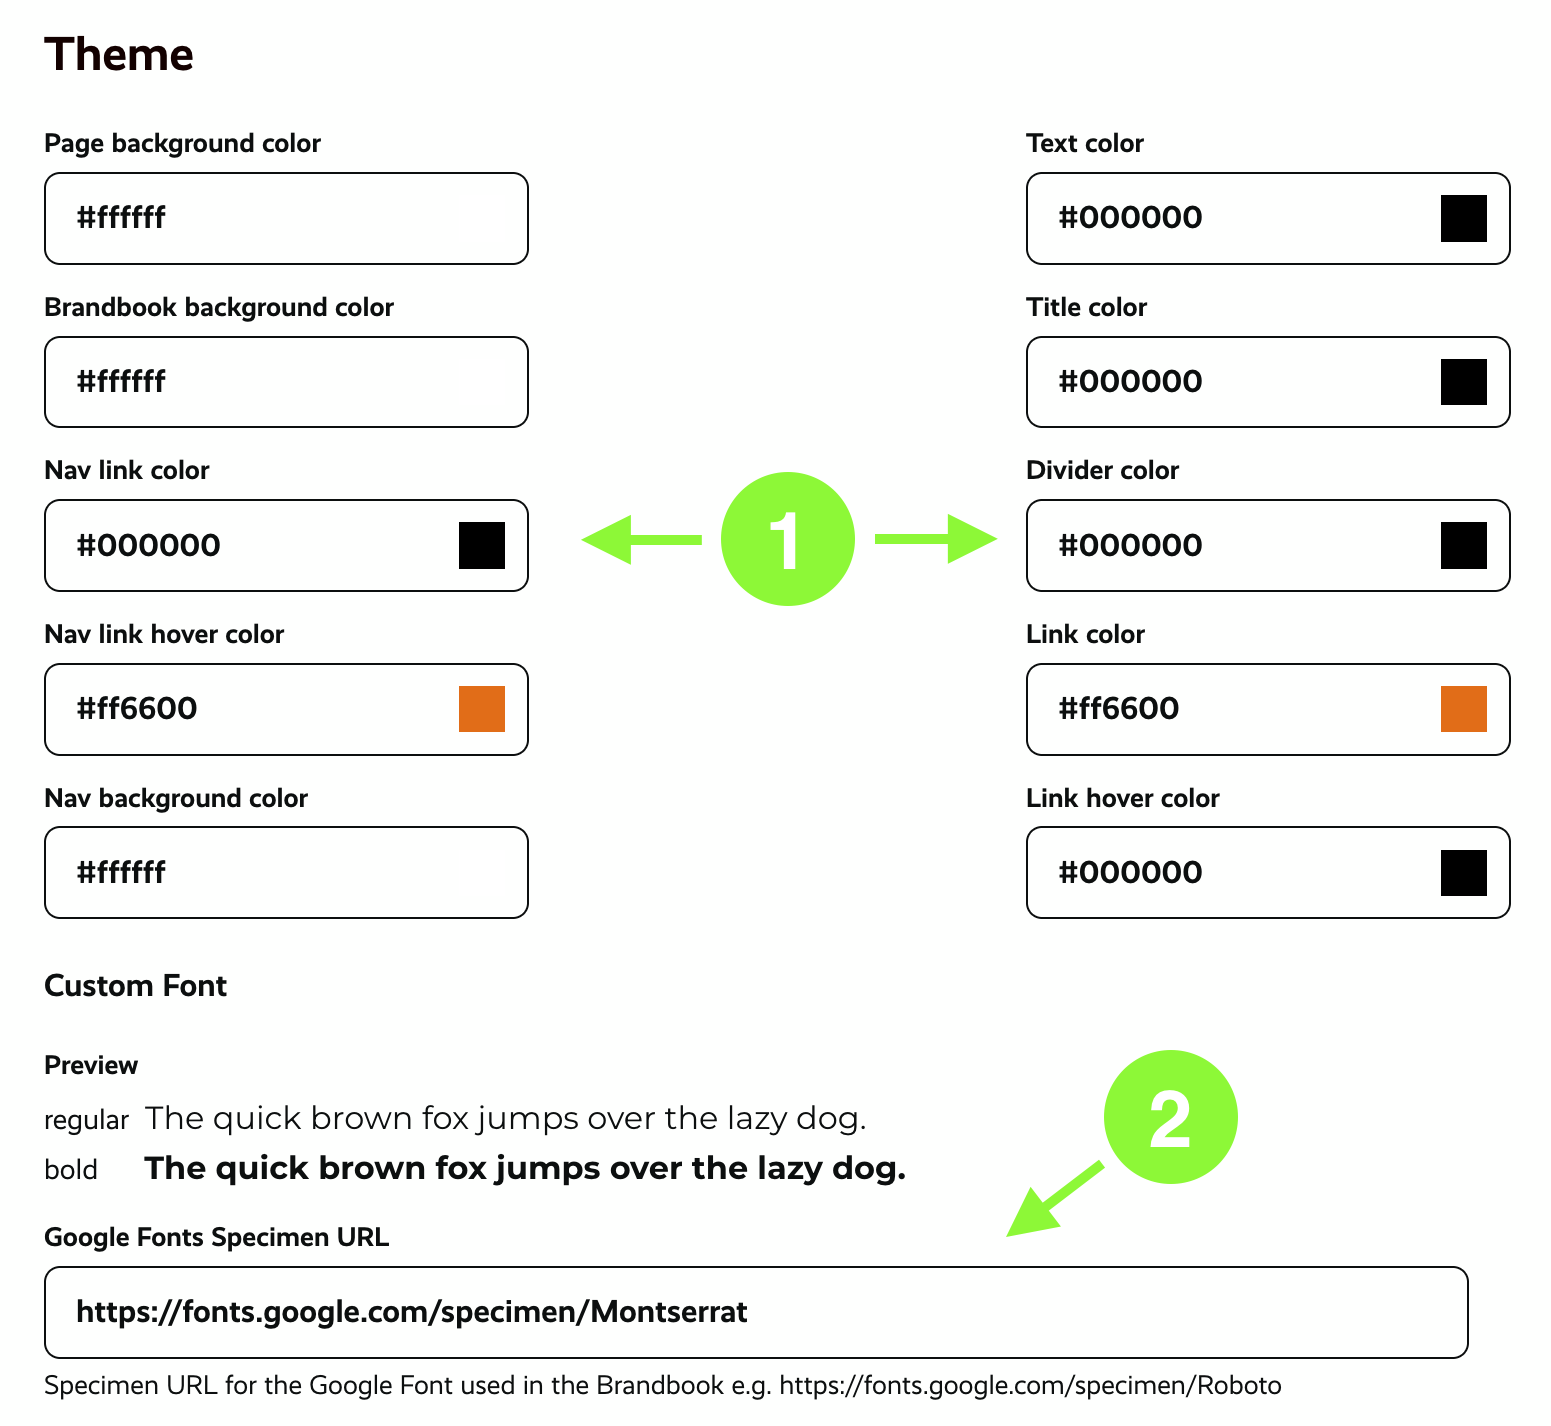
You can theme your Brandbook
- Define the Colors, you can use the brand colors
- Add a Google Font. Add the specimen URL for the Google Font in the text field e.g. https://fonts.google.com/specimen/Roboto Brandbook will find the different style by itself
Tab: Connected Accounts

The admins of the organization can see which other accounts are connected to the Brandbook.
Connected accounts can edit the Brandbook too like the organization admins.
In most cases the connected account is the design agency that created the identity design. Also, Brandbook support is connected.
On request, we can add or remove a connected account. support@brandbook.io